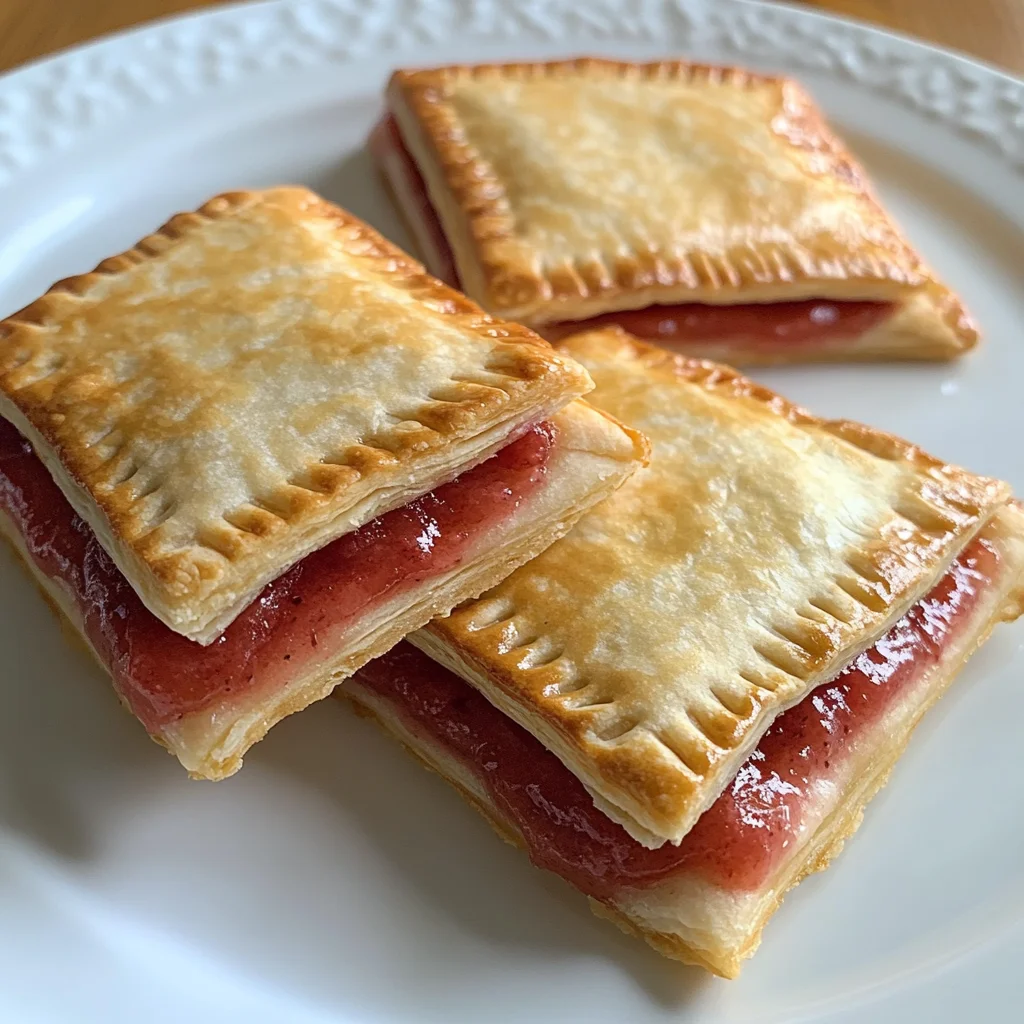
Craving a sweet treat that’s both nostalgic and delicious? Forget store-bought pop tarts – prepare yourself for the ultimate baking experience with these homemade pop tarts featuring a luscious strawberry filling. This recipe isn’t just about making pop tarts; it’s about crafting a personalized, flavorful treat that’s far superior to anything you’ll find in a box. From the flaky, buttery crust to the vibrant, homemade strawberry filling, every bite is a burst of homemade happiness. Imagine sinking your teeth into a warm, perfectly golden pastry, the sweet and tangy strawberry filling melting in your mouth. This recipe is more than just a recipe; it’s a journey into the heart of homemade baking, a chance to create something truly special, and a guaranteed crowd-pleaser.
Why You’ll Love This Recipe
There’s something undeniably satisfying about making something from scratch, especially when it’s as rewarding as these homemade pop tarts. This recipe transcends the simple act of baking; it’s about creating a truly personalized experience. You control every ingredient, ensuring the highest quality and freshest flavors in every bite. Forget artificial colors, preservatives, and overly sweet fillings – here, you’re the master of your pop tart destiny. The process is therapeutic, allowing you to unwind and enjoy the creative process. Plus, the aroma of baking pastries filling your kitchen will be an irresistible invitation to everyone around you. The look of pride on your face when you present these beautiful, homemade pop tarts will be worth every minute spent in the kitchen. It’s a recipe for success, guaranteed to impress friends, family, or simply satisfy your own sweet tooth.
Beyond the satisfaction of making something delicious from scratch, this recipe offers incredible flexibility. You’re not limited to just strawberry filling; feel free to experiment with other fruits, chocolate, or even savory combinations. This recipe is the perfect canvas for your culinary creativity, inviting you to explore endless flavor possibilities and create your own signature pop tart creations. The recipe itself is surprisingly simple, making it accessible even to beginner bakers. Detailed instructions and helpful tips guide you through each step, ensuring that your first attempt – and every attempt thereafter – is a resounding success. Imagine the feeling of accomplishment when you present a batch of perfectly baked, homemade pop tarts, a testament to your baking prowess and a delicious reward for your efforts. This isn’t just a recipe; it’s an experience, a journey of flavor and culinary creativity.
Why You Should Try This Recipe
This recipe is more than just a way to make homemade pop tarts with strawberry filling; it’s a chance to connect with the joy of baking and create something truly special. It’s a recipe that empowers you to take control of the ingredients and create a healthier, more flavorful treat than store-bought versions. You’ll appreciate the freshness and quality of the ingredients, the satisfyingly flaky crust, and the perfectly sweet-tart strawberry filling. Compared to store-bought pop tarts, these homemade versions are significantly healthier, allowing you to control the sugar content and avoid artificial ingredients. You’ll find that the homemade flavor is simply unbeatable – richer, more nuanced, and more rewarding.
This recipe is also a wonderful opportunity to involve family and friends in the baking process. From measuring ingredients to assembling the pop tarts, it’s a fun and engaging activity for all ages. It’s a perfect activity for a rainy afternoon, a family gathering, or a fun weekend project. Plus, sharing your homemade pop tarts with loved ones is an incredibly satisfying experience, adding another layer of joy to the whole process. Making these homemade pop tarts allows you to showcase your baking skills and create a lasting memory, a delicious legacy passed down through generations. You’ll discover that homemade baking is much more rewarding than you ever imagined.
Ingredients and Necessary Utensils
This section details the ingredients and utensils you’ll need to make delicious homemade pop tarts with strawberry filling. Gathering everything beforehand ensures a smooth and efficient baking process.
For the Pastry Dough:
- 2 ½ cups all-purpose flour (or gluten-free blend for a gluten-free version)
- 1 tsp salt
- 1 cup (2 sticks) unsalted butter, very cold and cut into cubes
- ½ cup ice water
For the Strawberry Filling:
- 16 oz fresh strawberries, hulled and sliced
- ½ cup granulated sugar
- 2 tbsp cornstarch
- 1 tbsp lemon juice
- ¼ tsp vanilla extract
For the Glaze (Optional):
- 1 cup powdered sugar
- 2-4 tbsp milk or water
- Pinch of salt
- Optional: Food coloring (for fun variations!)
Necessary Utensils:
- Large mixing bowl
- Pastry blender or two forks
- Measuring cups and spoons
- Rolling pin
- Pizza cutter or sharp knife
- Baking sheet
- Parchment paper
- Small saucepan
- Whisk
- Spatula
- Cookie cutters (optional, for fun shapes)
- Pastry brush (optional)
Detailed Recipe Steps
Follow these steps for perfectly crafted homemade pop tarts with strawberry filling.
Step 1: Making the Pastry Dough
- Whisk together the flour and salt in a large bowl.
- Cut in the cold butter using a pastry blender or two forks until the mixture resembles coarse crumbs.
- Gradually add the ice water, mixing until the dough just comes together. **Do not overmix.**
- Form the dough into a disk, wrap in plastic wrap, and chill in the refrigerator for at least 30 minutes. This allows the gluten to relax and prevents shrinkage during baking.
Step 2: Preparing the Strawberry Filling
- In a small saucepan, combine the sliced strawberries, sugar, cornstarch, lemon juice, and vanilla extract.
- Cook over medium heat, stirring constantly, until the mixture thickens and comes to a simmer. This usually takes about 5-7 minutes. **Make sure to stir frequently to prevent burning.**
- Remove from heat and let cool completely before using. This prevents the pastry from getting soggy.
Step 3: Assembling the Pop Tarts
- On a lightly floured surface, roll out the chilled dough to about ⅛ inch thickness. **Use even pressure to achieve consistent thickness.**
- Use a knife or pizza cutter to cut out rectangles or squares (approximately 4 inches by 3 inches). For extra creativity, use cookie cutters for fun shapes!
- Place a spoonful of the cooled strawberry filling onto half of each rectangle. If using a more liquid filling, ensure enough has thickened up.
- Fold the other half of the rectangle over the filling to create a pop tart.
- Crimp the edges with a fork to seal them tightly. **Ensure a good seal to prevent leakage.**
- Place the assembled pop tarts onto a baking sheet lined with parchment paper.
Step 4: Baking the Pop Tarts
- Preheat your oven to 375°F (190°C).
- Bake for 15-20 minutes, or until the pop tarts are golden brown and the filling is bubbling. **Keep a close eye to prevent burning.**
- Let the pop tarts cool completely on a wire rack before glazing.
Step 5: Making the Glaze (Optional)
- Whisk together the powdered sugar, milk (or water), and a pinch of salt until smooth. Add more milk or water to reach desired consistency.
- Once the pop tarts are completely cool, drizzle the glaze over the top. This step is entirely optional but adds a beautiful and delicious touch.
Tips and Variations
Here are some tips and variations to enhance your homemade pop tart experience:
- For a richer flavor, use a combination of butter and shortening in the pastry dough.
- Experiment with different fillings: try blueberry, raspberry, apple, chocolate, or even a savory cheese and herb filling.
- Make it vegan: substitute the butter with vegan butter and use a vegan egg replacer. Many excellent gluten-free flour blends are also available.
- For a gluten-free version, use a high-quality gluten-free flour blend designed for pastries. You might need to adjust the liquid slightly.
- To prevent soggy bottoms, ensure the filling is completely cool before assembling the pop tarts. Also, ensure that the edges are tightly crimped.
- Don’t overbake: Keep a close eye on the pop tarts in the oven, and remove them as soon as they are golden brown.
- Get creative with the glaze: add food coloring, sprinkles, or even a dusting of powdered sugar for extra flair.
Nutritional Values and Benefits
While a treat, homemade pop tarts offer some nutritional benefits compared to store-bought versions. The nutritional information will vary depending on the specific ingredients used and portion sizes. However, using fresh fruit like strawberries adds essential vitamins and antioxidants. Strawberries are a good source of Vitamin C, manganese, and fiber. The homemade aspect allows you to control the sugar content, potentially reducing added sugars compared to commercially produced pop tarts.
The pastry dough provides carbohydrates for energy, while the butter adds some healthy fats that are crucial for the absorption of certain nutrients. Remember, portion control is key. Enjoy these pop tarts as an occasional treat rather than a regular part of your diet. You can use nutritional calculators online to get a more accurate approximation based on your specific ingredients and portion size.
FAQ – Answers to Common Questions
Here are some answers to frequently asked questions about making homemade pop tarts with strawberry filling:
- Q: Can I freeze the pop tarts? A: Yes! Freeze them before or after baking. If freezing before baking, assemble and freeze on the baking sheet, then transfer to a freezer bag. If freezing after baking, allow to cool completely before freezing. Reheat in the oven or toaster oven until warmed through.
- Q: What if my pastry dough is too sticky? A: Add a tablespoon or two of additional flour, a little at a time, until the dough reaches the desired consistency. Be careful not to add too much.
- Q: My pop tarts are burning on the edges. A: Reduce the oven temperature by 25 degrees and keep a close watch. You might also try placing a baking sheet on a lower rack to help protect the bottom from excessive heat. This will also assist in ensuring they bake evenly.
- Q: Can I use frozen strawberries? A: Yes, but be sure to thaw them completely and drain off any excess liquid before adding them to the filling. This will prevent a watery filling.
- Q: How long do the pop tarts last? A: Store homemade pop tarts in an airtight container at room temperature for up to 3 days or in the refrigerator for up to a week. Frozen pop tarts can last for up to 3 months.
- Q: Can I make the filling ahead of time? A: Yes! The strawberry filling can be made a day or two in advance and stored in the refrigerator. Allow it to cool completely before using.
Conclusion
Making homemade pop tarts with strawberry filling is a rewarding and delicious experience. This recipe provides a guide to create a delightful, homemade treat that surpasses store-bought versions in flavor, quality, and personalization. The detailed instructions, tips, and FAQs aim to ensure a successful baking experience for everyone, from beginner bakers to seasoned professionals. Remember to experiment with different fillings and glazes to create your own unique pop tart creations! This recipe is not merely about creating a delicious snack; it’s about crafting a special memory in your kitchen.
We encourage you to try this recipe and share your experience in the comments below! Don’t forget to share your beautiful creations on social media using #homemadepoptarts #strawberrypoptarts. For more delicious recipes like this one, be sure to check out our extensive recipe collection at lorachef. Happy baking! Learn more about the history of pastries on Wikipedia.
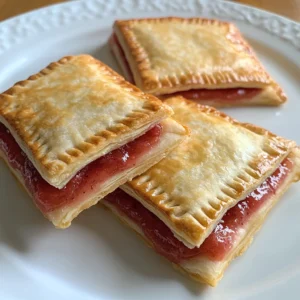
Homemade Strawberry Pop Tarts
Equipment
- Mixing Bowls
- Rolling Pin
- Baking Sheet
- Knife
- Parchment Paper
Ingredients
Crust Ingredients
- 2 cups All-purpose flour
- 1/2 teaspoon Salt
- 1/2 cup Sugar
- 1 cup Unsalted butter cold, cut into cubes
- 1/2 cup Ice water approximately
Filling Ingredients
- 1 cup Strawberry jam
- 1 tablespoon Cornstarch
- 2 tablespoons Sugar
Instructions
Instructions
- Whisk together flour, salt, and sugar in a large bowl.
- Cut in cold butter using a pastry blender or your fingers until the mixture resembles coarse crumbs.
- Gradually add ice water, mixing until the dough just comes together. Do not overmix.
- Divide the dough in half, flatten into discs, wrap in plastic wrap, and chill for at least 30 minutes.
- On a lightly floured surface, roll out each disc of dough thinly (about 1/8 inch).
- Use a 4x5 inch rectangle cookie cutter or knife to cut out rectangles.
- In a small bowl, combine strawberry jam, cornstarch, and sugar. Spread a spoonful of filling onto half of the rectangles.
- Top with the remaining rectangles, pressing edges to seal. Crimp the edges with a fork.
- Bake on a parchment-lined baking sheet at 375°F (190°C) for 15-20 minutes, or until golden brown.
- Let cool completely before frosting (optional).
